
3 Minute Read
| Overview
New points can be added, and existing points can be edited or deleted from the Domain Modeler tool.
The Domain Modeler tool is developed as such to check for certain criteria while adding/deleting a point. The criteria are so set up that the user is not missing any aspect during the point addition or deletion.
The following is achieved with the check criteria set up.
- No repetitive points are added
- No new point names can be added with the same tag or with a subset points list
- When tags are deleted, the tool makes sure it deletes them from all the associated points
| View the Points
From the tags home screen.
- Click on the view icon to view any points.
The point details window displays details like the point name, description, tags constituting, Data type, unit and minimum, and maximum and incremental value of the point.
| Confirm Availability of a Point
Before adding a new point from the domain modeler points screen,
- Search for the point you wish to add, to confirm the availability of the point or a similar point.
The search results are displayed
Note: The tool displays the search results, based on the keyword search in both the point name and Description field columns.
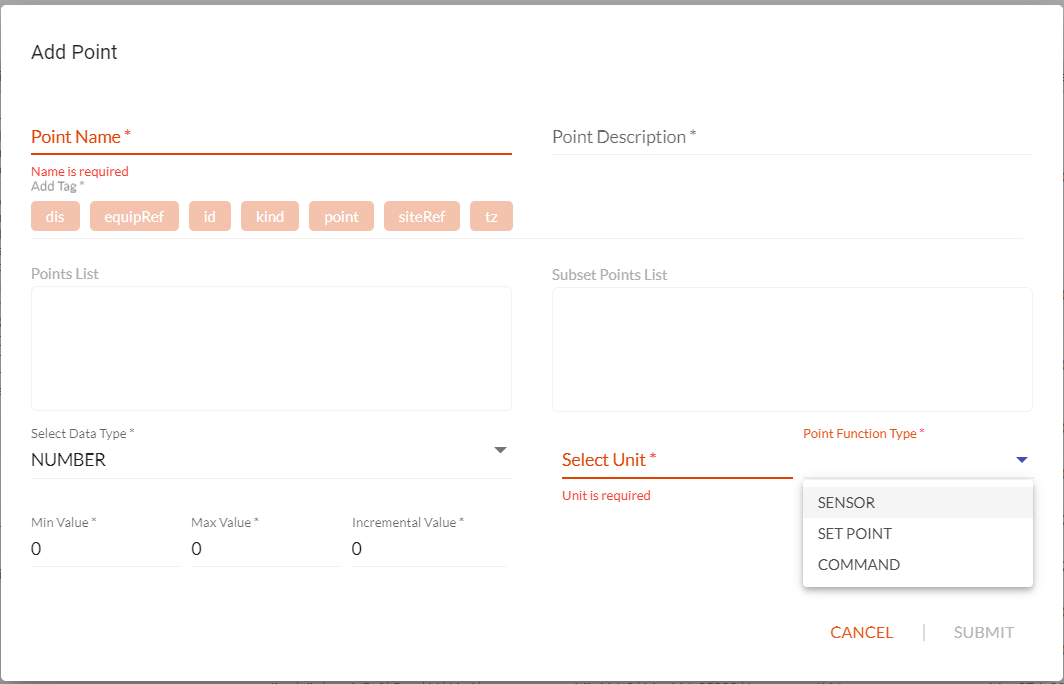
| Add a New Point
To add a new point from the domain modeler points screen
- Click Add Point.
The add point window is displayed.
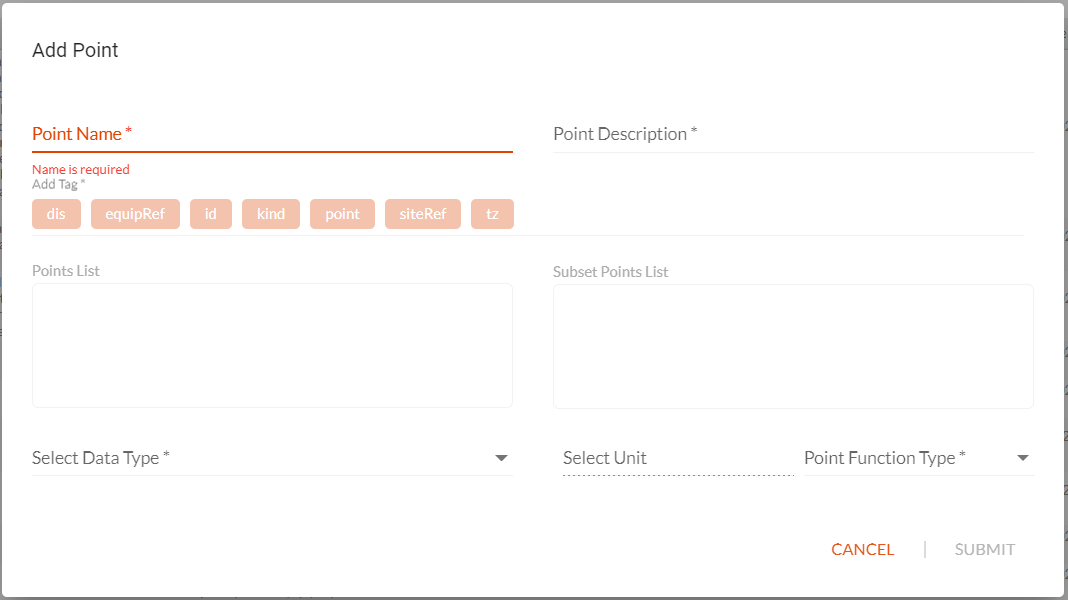
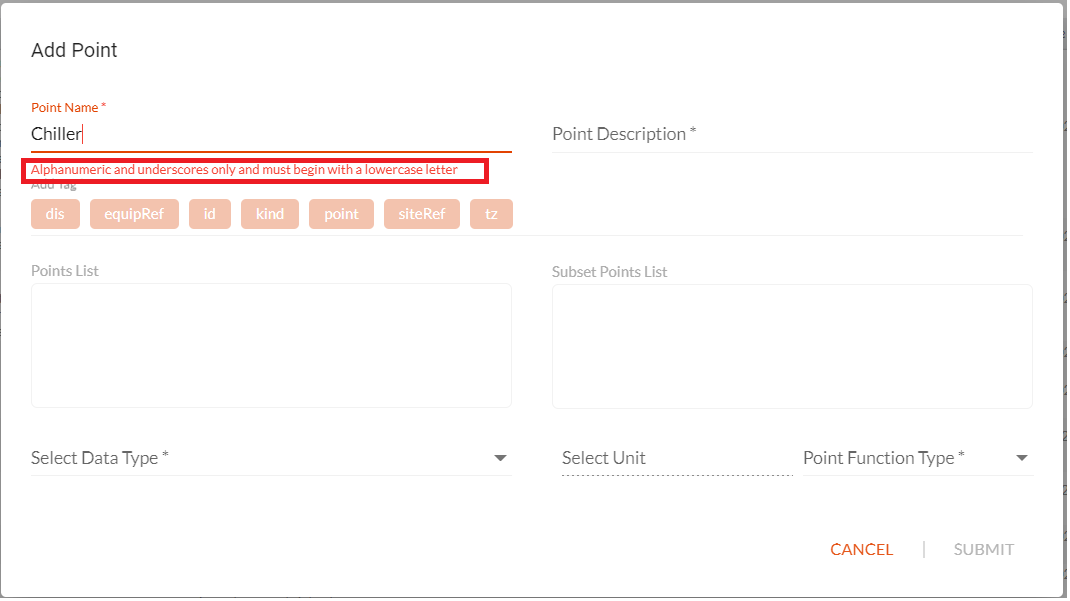
- Enter the Point name
Note: The tool displays a message as to what is to be added as a point name as below
When different format names are entered.
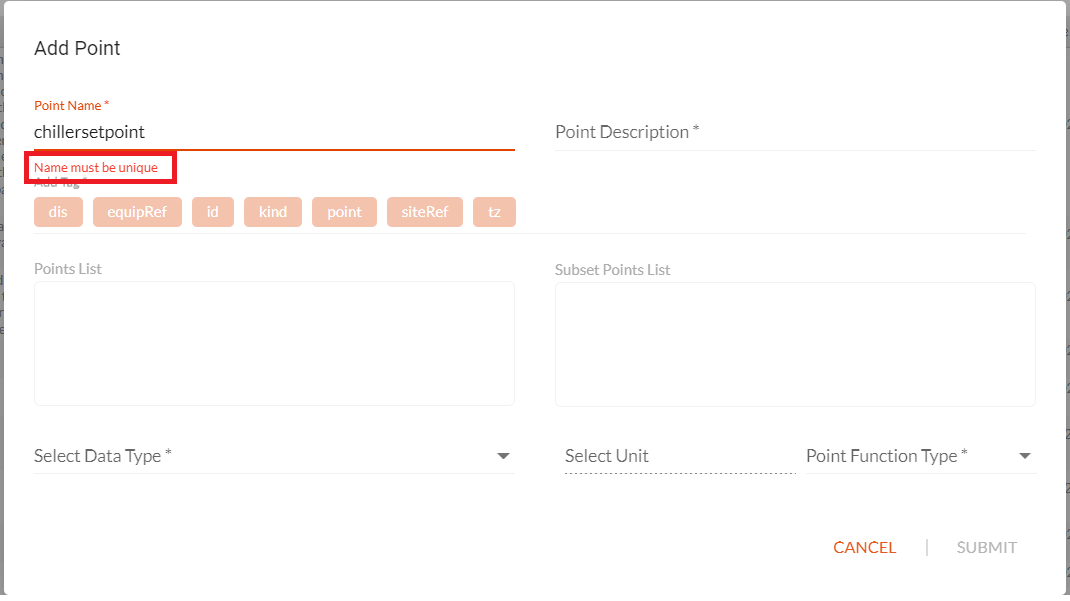
Note: The tool displays a message for a unique name to be used for the new point.
When already existing names are entered
- Enter a valid point name
- Enter a valid description for the point.
- Select the data type for the point.
- Select the unit for the point.
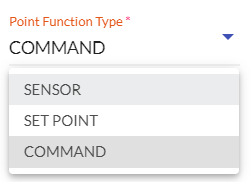
- Select a point function type from below.

The above entries and selection would populate the matching existing points in the tool as below, which can be referenced for the tags.

- Select an existing point, you want to reference.
The tags associated with the point are displayed, with a distinction between the tags that can be deleted and tags that cannot be deleted.
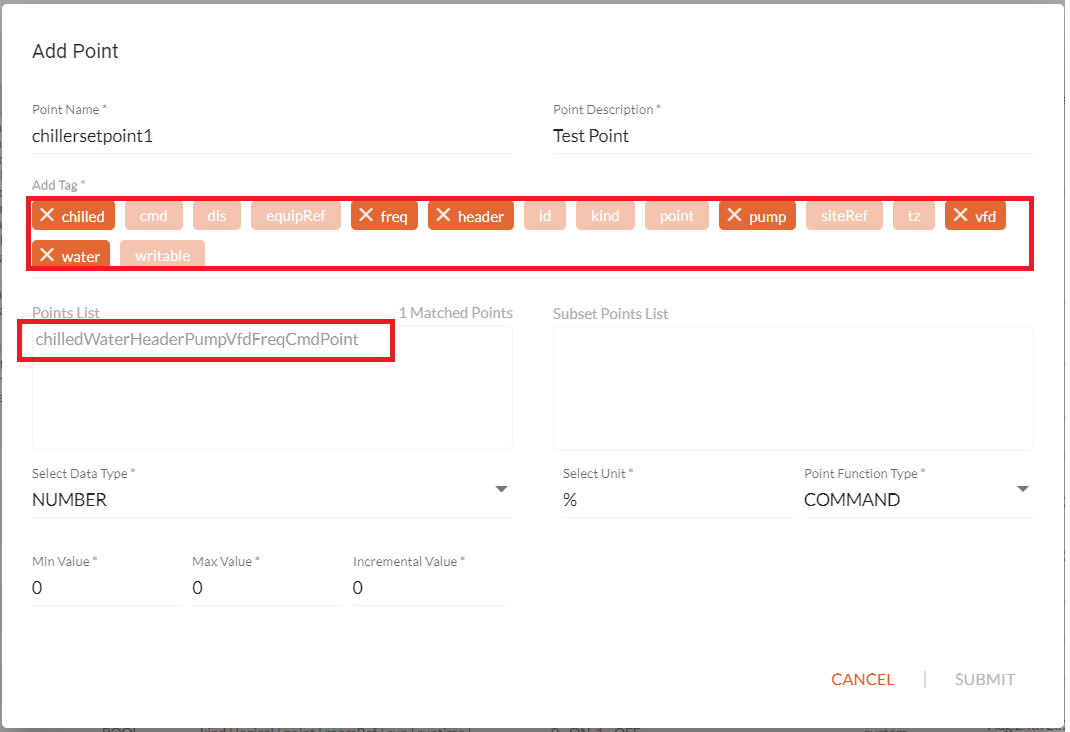
- Delete the tags that are not required, simply by clicking the cross on the tag that can be deleted.
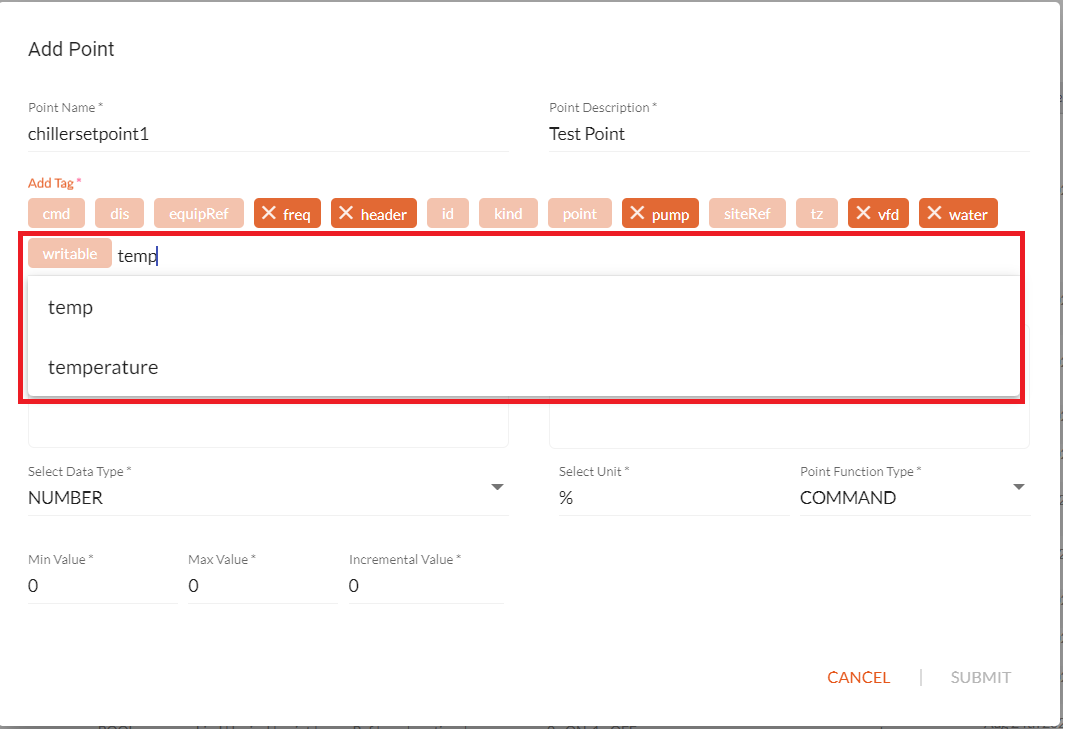
- Type and add more required tags as below.

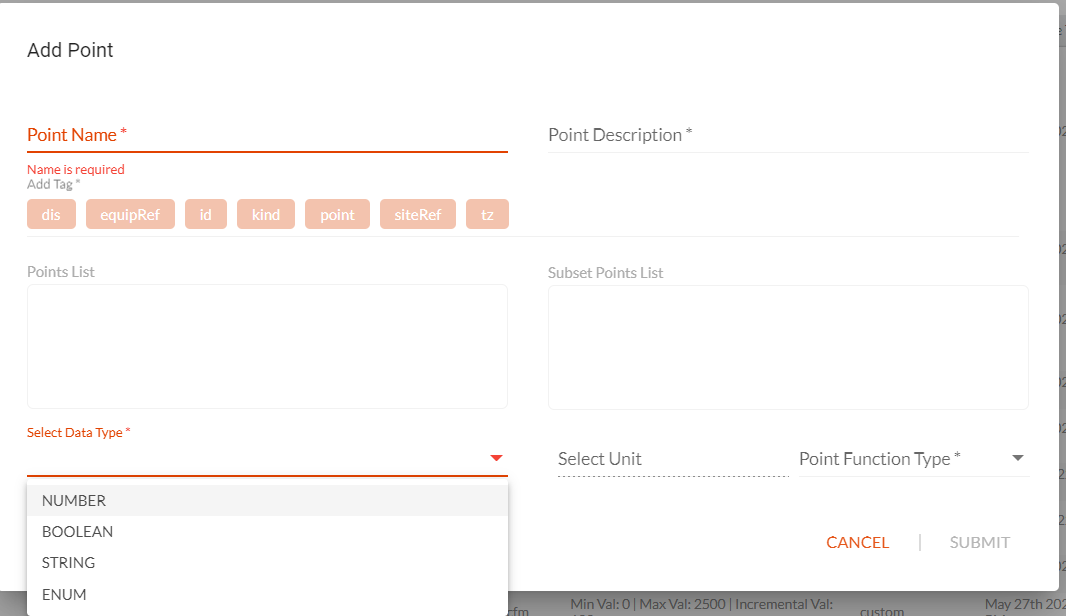
Enter the desired data type from the Select Data Type Drop down Menu
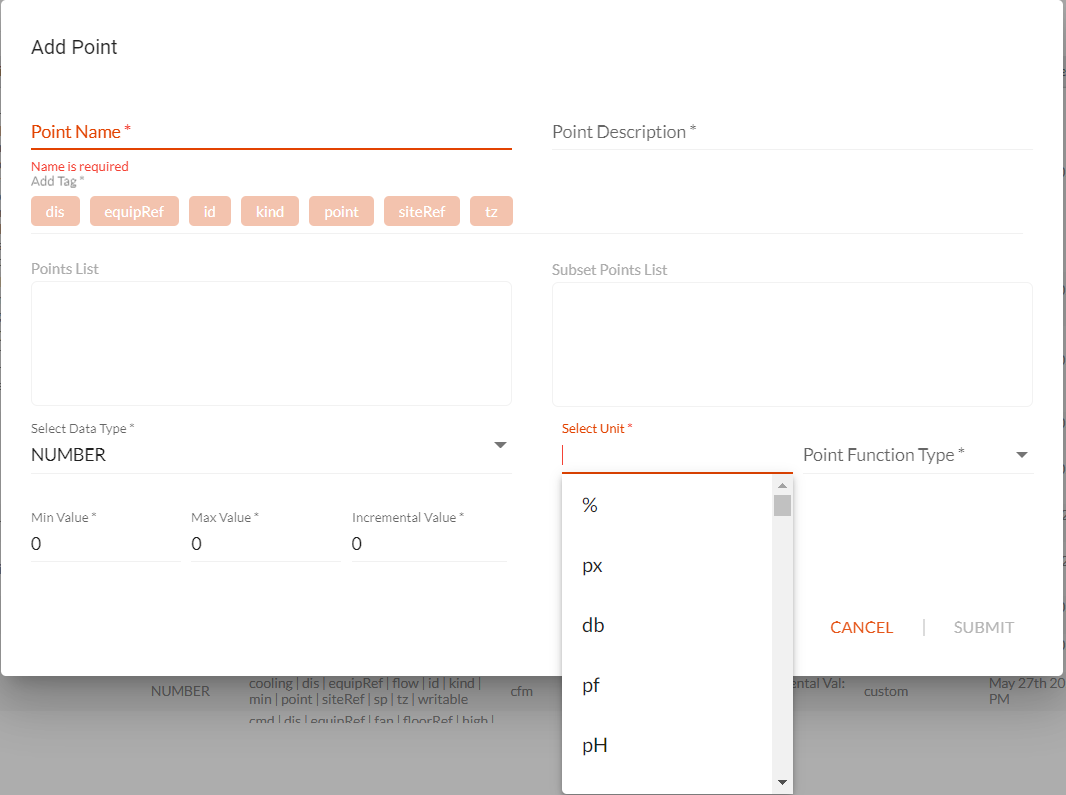
Enter the desired Unit from the Select Unit Drop Down Menu
Enter the desired function type from the Point Function Type Drop Down menu

If Boolean is selected as the desired data type then corresponding values have to filled in for Index 0 and 1.
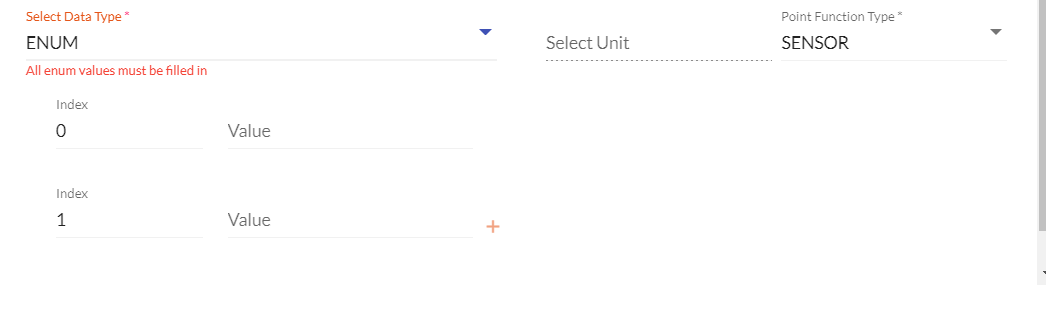
If the data type ENUM is selected, then the corresponding enum values have to be filled in.
Enter the Min, max, and incremental values if applicable as below:
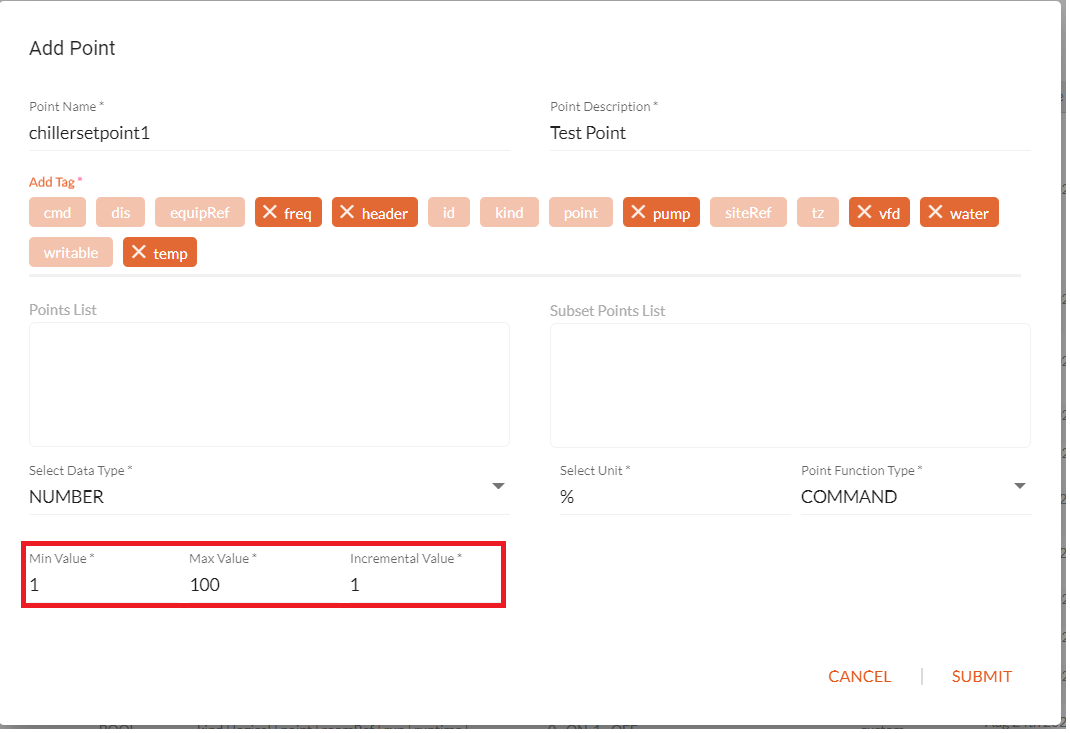
If the data type NUMBER is selected, then the corresponding max and min values have to be filled in.
- Click Submit to add the point.
The point is added to the list of points.
Note: Only after a point is added successfully, the point is made available in other places for selection.
| Edit Existing Point
To edit an existing point from the domain modeler points screen
- Locate the point to be edited
- Click the edit
 icon.
icon.
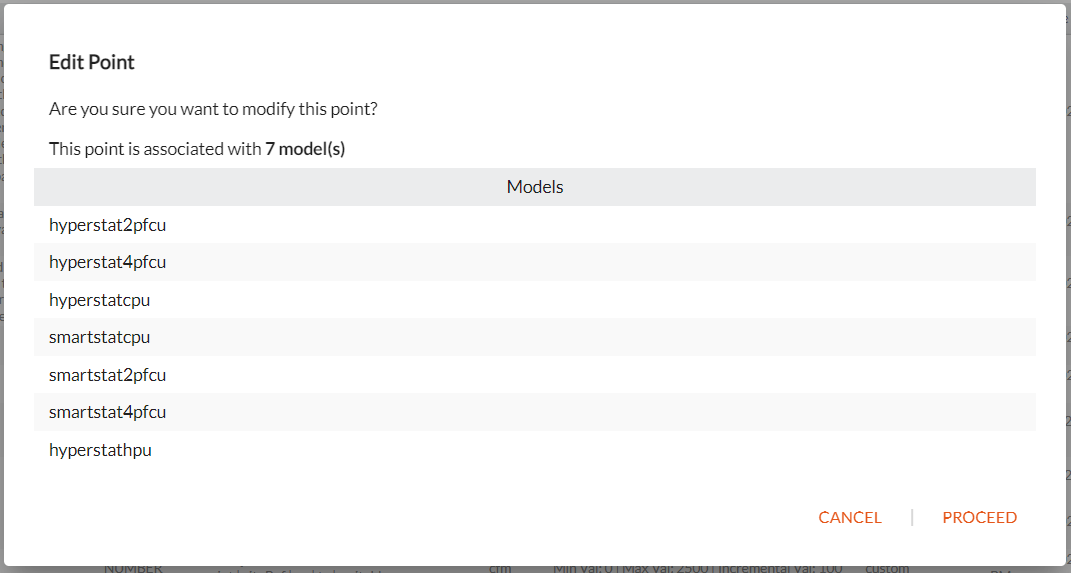
A message window with the message on the point associated with models is displayed if any.
- Click Proceed to edit the point.
The Edit point window is displayed.
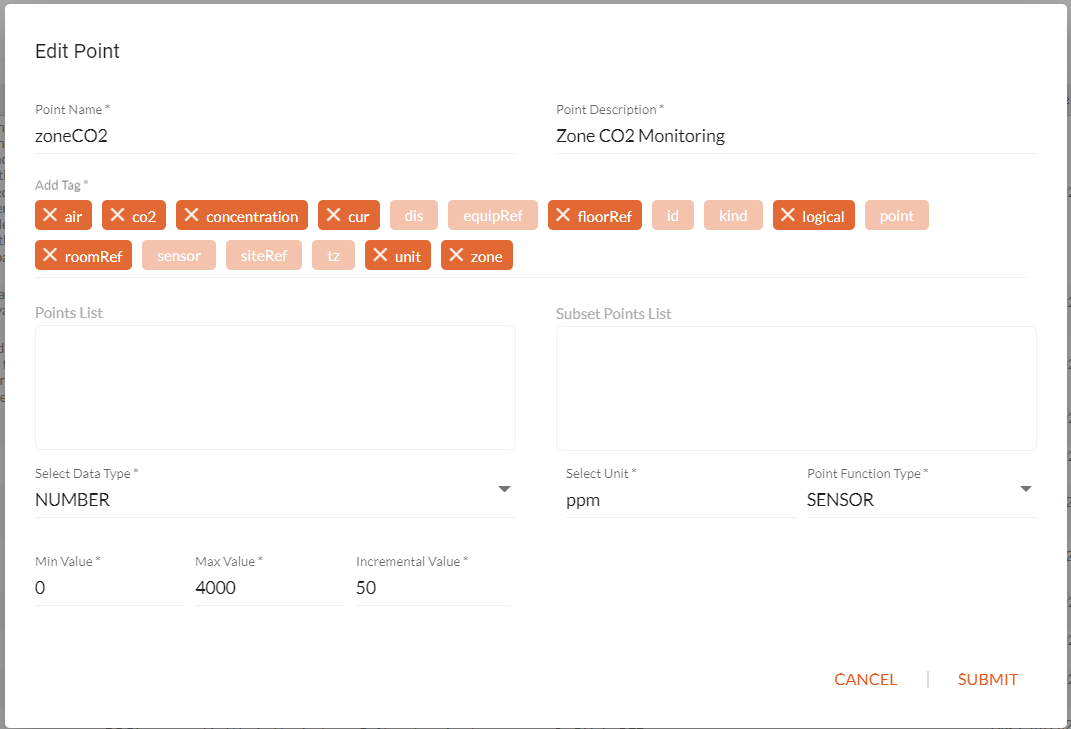
- Make the necessary edits.
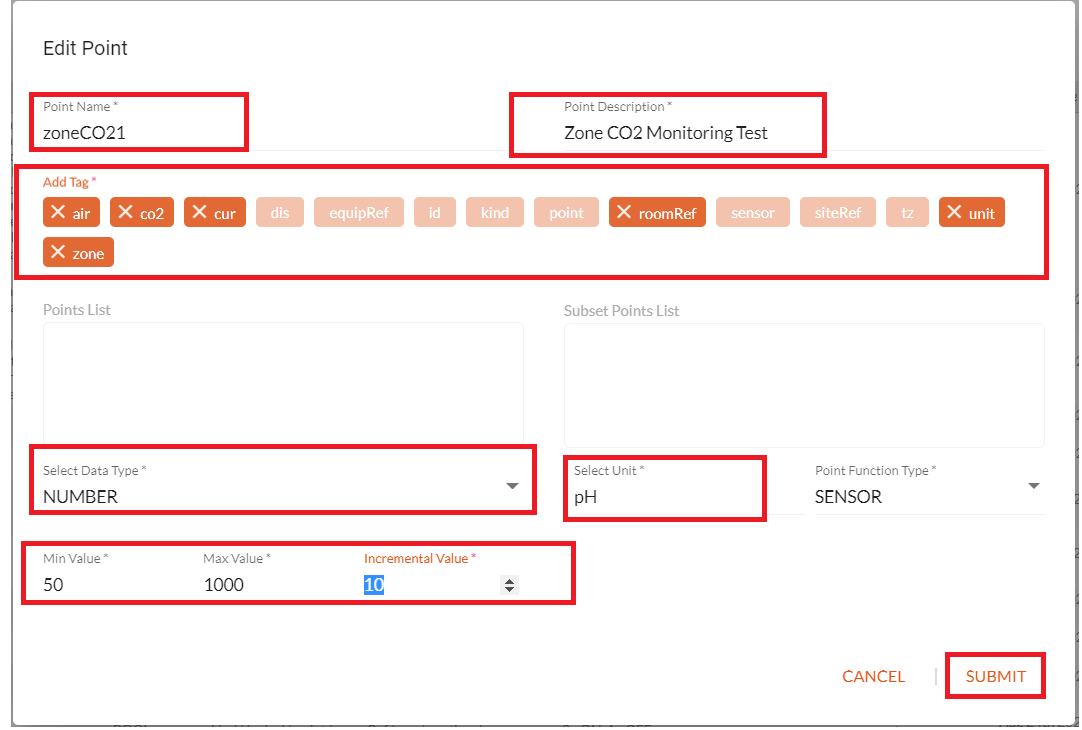
- Click Submit to confirm on the edit
The edit gets saved.
| Delete Existing Point
To delete an existing point,
From the domain modeler points screen,
- Locate the point to be deleted
- Click the delete
 icon.
icon.
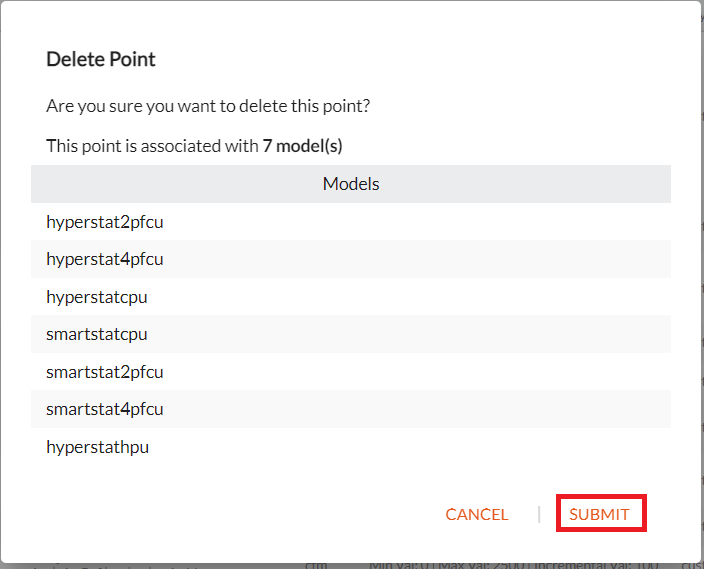
- Click Submit to confirm on the delete.
The point gets deleted breaking its association from the point.
| Change Logs
To view the changes made to the points library.
- Click the Change logs
The change logs window displays.
- Click on the calendar field to select a date range, for which you want to see the change logs.
The change logs result for the selected duration displays the details of the change made to the points library.
You can see the number of additions, deletions, and edits for the result displayed.
| Download Points
To download the points in the library.
- Click Download.
The window to specify the download format displays.
You can download the points either in JSON or CSV format.
A sample for a JSON format downloaded:
A sample for a CSV format downloaded:
Comments
0 comments
Please sign in to leave a comment.